Your cart is currently empty!


Table of Contents
Redirects are an essential part of site maintenance and SEO. This article walks through redirect basics and how to add them in Squarespace, a popular website builder known from every podcast ad ever.
By the end of the tutorial, you should know the essentials and how to manage your website’s pages while preserving as much SEO value and link equity as possible.
What to Know About Redirects
Sometimes, you need to move or manage a page on a website. For example, you may have a URL like “https://yoursite.com/old-page”, but you want to move the page to an updated version at a different URL, such as “https://yoursite.com/new-page”.
Now, not every redirect is equal. There are many types of redirects, but the two most common and important are:
- 301: A permanent redirect. Best for SEO and most purposes.
- 302: A temporary redirect. It has e-commerce uses and other applications but is rarely used in site maintenance.
If you want to preserve the most SEO value you can from the redirect, use a 301, as that’s what Google prefers because it signals the page has permanently moved and they can change their search listing accordingly.
Process
Follow these steps to add a redirect to your site:
1. Log in to your Squarespace account. Go to your Squarespace website and log in with your credentials. If you have multiple sites, choose which to edit in the Dashboard.
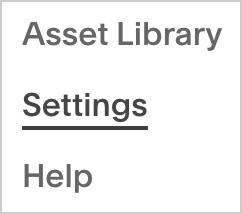
2. Go to Settings at the bottom-left.
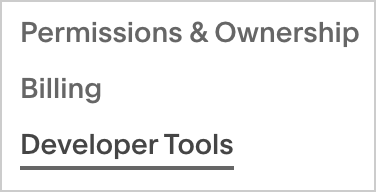
3. Choose Developer Tools.
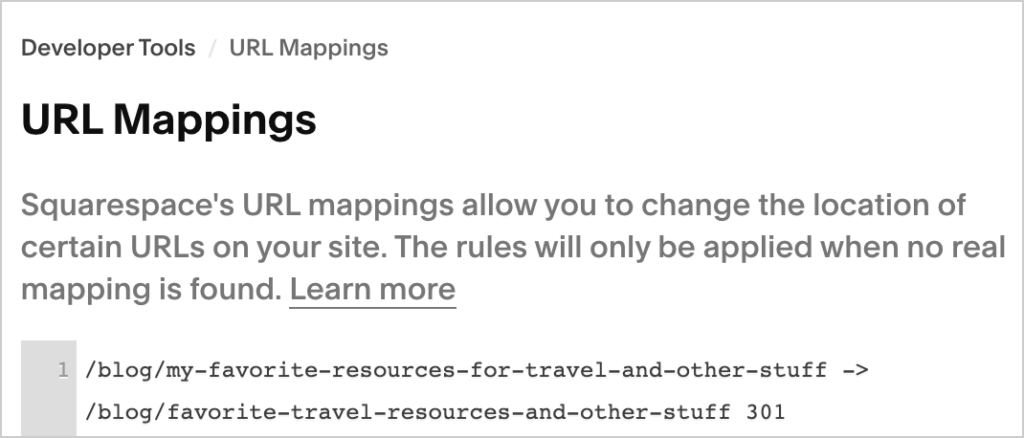
4. Choose URL Mappings.

5. Add your redirects with the guidelines below.
In the URL Mappings box, you’ll enter redirect instructions in a specific format:
- /old-url: The part of the old URL after the top-level domain (TLD) like “.com”.
- ->: An arrow between two spaces.
- /new-url: The same format, but use the final target URL you want.
- 301: The type of redirect you want, usually a 301.
For example, if you want to redirect from www.example.com/old-page to www.example.com/new-page, you would enter:
/old-url -> /new-url 301Notice how you don’t need to add the full address, just the last part of the URL.
Here’s a screenshot of a working redirect on a Squarespace site:
6. Click Save at the top-right, which appears if you make changes.

7. Test your redirect. Visit the Old URL on your site and see if the redirect works. If it doesn’t, try correcting the error and testing again.
Result
If all goes well, your redirects should work, and Squarespace should direct you and your visitors according to your instructions.
If you want to notify Google of the changes, you can log into Search Console and submit the old URL for a recrawl. It might take a few days for Google to update their index, but the search results should reflect your updates. ?
Further Resources
For more, you can check out Squarespace’s documentation on redirects. They also have an easy-to-follow video that covers the same steps outlined in this article:
Topics